- Module Activation
Once you install the package successfully, now its time to activate the modules.
Login to the admin panel and search the icon Wbcom, once you find click on it and search for the sub-menu of Age Verifications.
Under Age Verifications, you can get Age Configurations, click on it.
Log In Admin panel -> Wbcom Menu -> Age Verifications -> Age Configurations Image1.1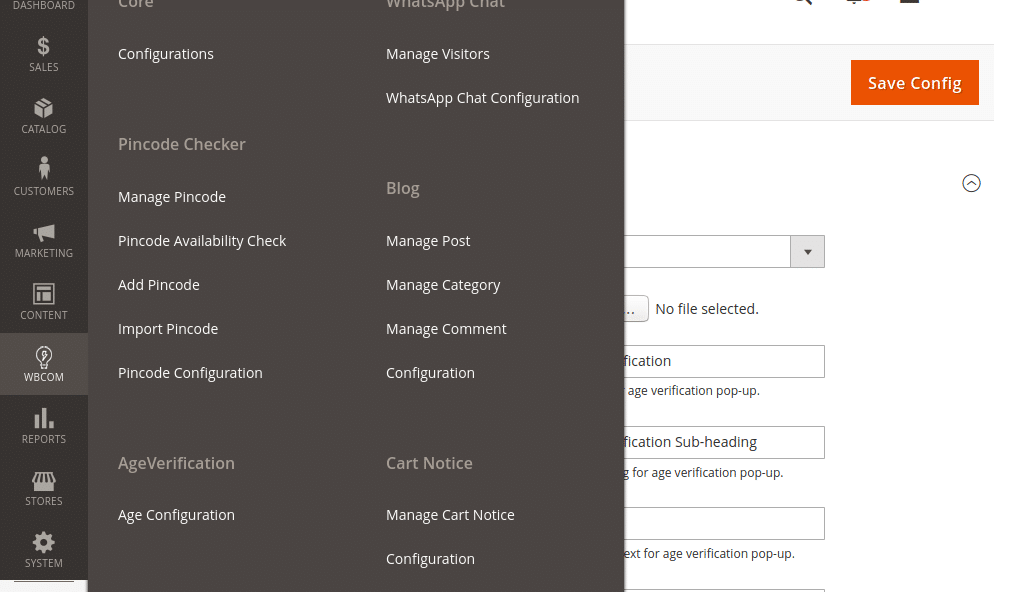
Image1.2
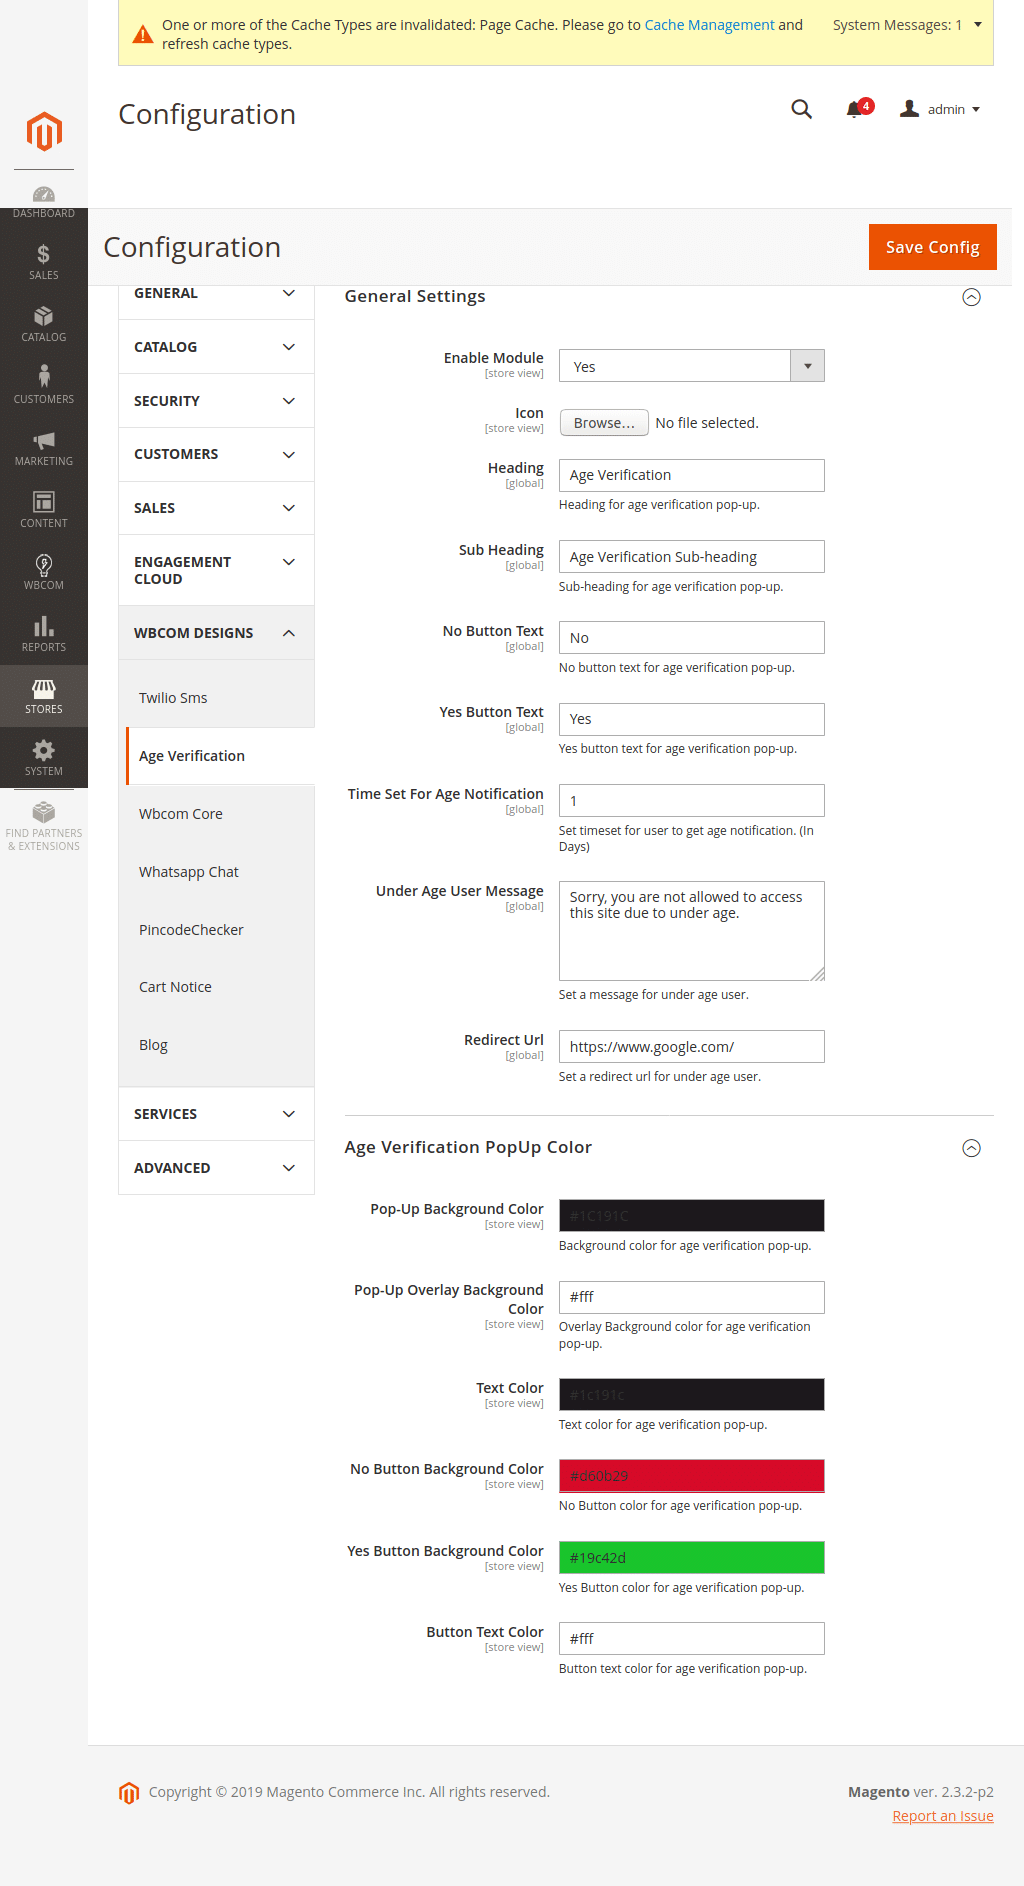 In image 1.2 you can see options “Enable Module”. To enable module select option “Yes” and to disable the module select “No” option and save configurations.
 - Module Configurations (Reference Image 1.2)
Icon: You can change the dynamic icon on a pop-up as per your requirements.
Heading: Add heading that you want to show on the pop-up.
Sub Heading: Add sub-heading that you want to show on the pop-up.
No Button Text: Change button text dynamically that you want to show.
Yes Button Text: Change button text dynamically that you want to show.
Time Set For Age Notification: Set time duration to display age notification pop-up again to the user.
Under Age User Message: Show a dynamic message to the user if anyone is underage.
Redirect Url: Set Redirect URL for underage users.
Pop-Up Background Color: Set Age verification pop-up background-color.
Pop-Up Overlay Background Color: Manage pop-up overlay background color.
Text Color: Set the Text color for the pop-up.
No Button Background Color: Set the “No” button background color dynamically.
Yes Button Background Color: Set the “Yes” button background color dynamically.
Button Text Color: Set the “Button” text color dynamically.
- Frontend View
Once the module is enabled and configurations are done it is visible on the frontend as follows.Image1.3
