Module Activation
Once you install the package successfully, you need to activate the modules.
Login to the admin panel and navigate to WBCOM menu. Click on it and search for the sub-menu of Pincode Checker.
Under Pincode Checker, you will find Pincode Configurations. Click on it.
Log In Admin panel -> Wbcom Menu -> Pincode Checker -> Pincode Configurations
Image1.1

Image1.2
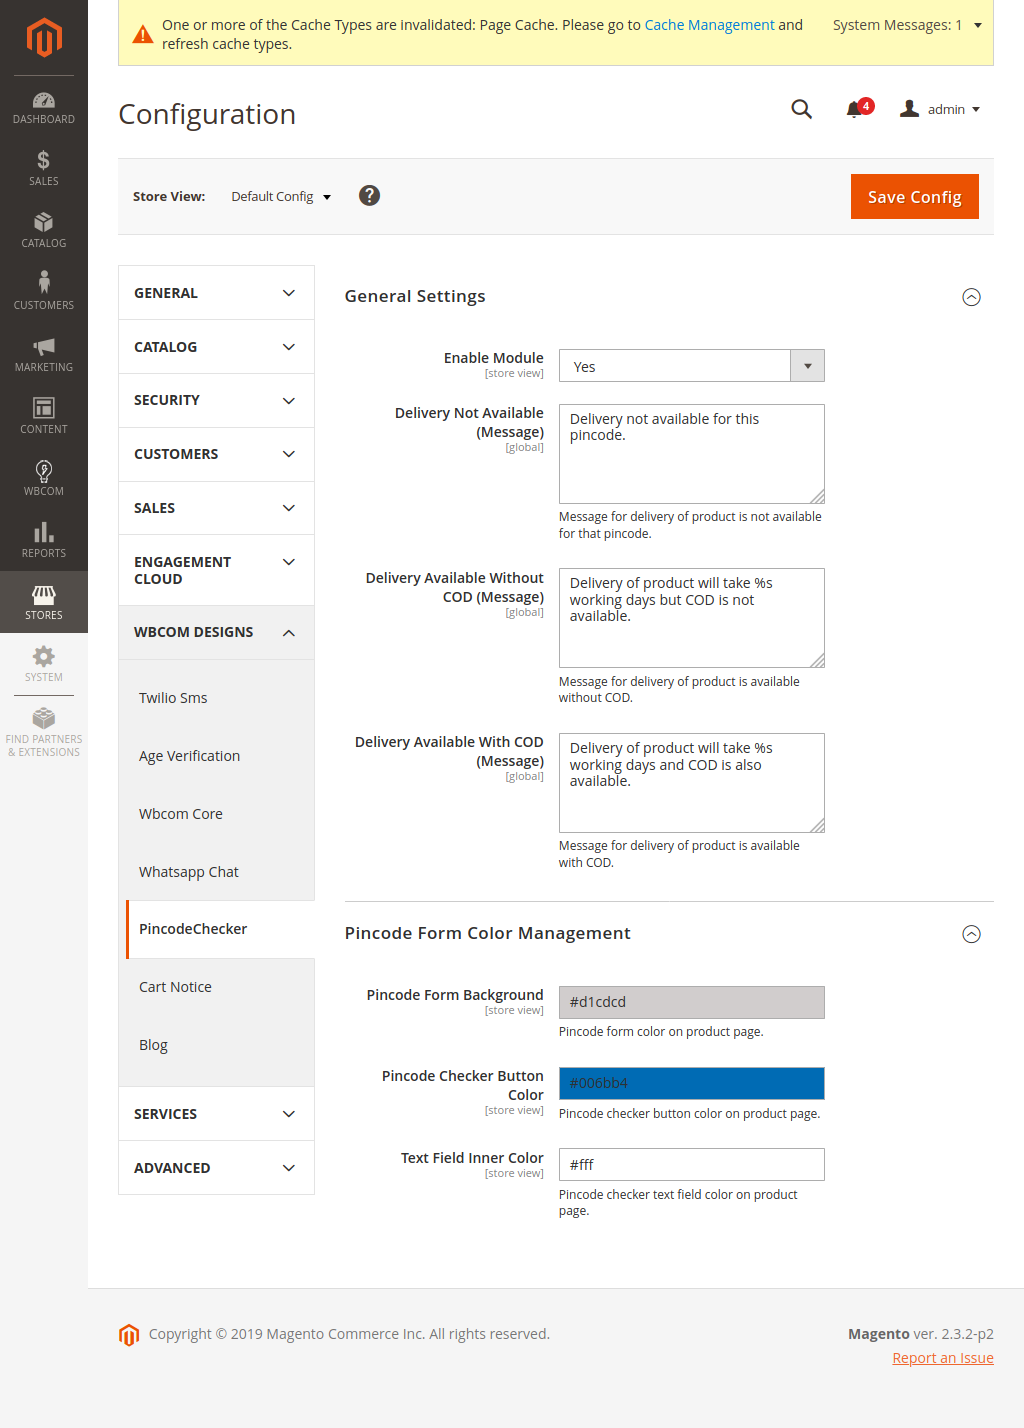
In image 1.2, you can see the option “Enable Module”
- To enable the module, select the option “Yes”
- To disable module, select “No” option
And, save configurations.
Module Configurations (Reference Image 1.2)
Delivery Not Available (Message): Admin can set a message for the case when the delivery of products is not available.
Delivery Available Without COD (Message): Admin can set a message for the case when the delivery of products is available but cash on delivery is not available.
Delivery Available With COD (Message): Admin can set a message for the case when the delivery of products is available for the particular area on COD.
Pincode Form Background: Admin can set the background color of the Pincode checker form.
Pincode Checker Button Color: Admin can set Pincode checker button color.
Text Field Inner Color: Admin can set the color for Text field.
Manage Pincode:
Admin can add, edit and delete, and manage the Pincode list through this grid
Image1.3

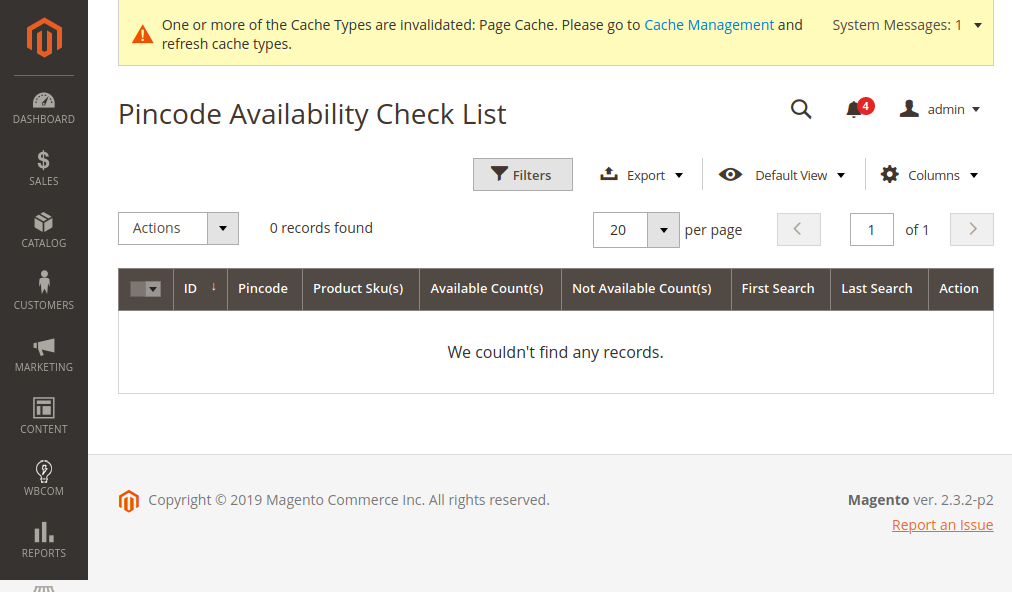
Pincode Availability Check:
Here admin can manage total availability check done for a particular Pincode.
And, from the front-end, customers can check where the delivery and COD is feasible based on Pincodes.
Image1.4
Mass Pincode Import:
Admin can upload the Pincode list in bulk in a CSV format.
Image1.5

Frontend View:
(a) Product Page Pincode Checker Form:
Image 1.6
